Product Features:
· Imported Chip: 32-bit processor with high-speed response
· Fully isolated independent power supply; power between channels does not interfere with each other for better stability
· Independent power feedback module design delivers higher stability and more thorough isolation
· International standard communication interface
· Anti-interference Housing: Adopts plastic alloy and aluminum profile mold forming process for superior anti-interference performance
· Simple wiring method, suitable for all industrial sites
· Triple isolation of power supply, power distribution and chip, with strong EMC 4000V anti-interference capability
· Multi-signal input support: Compatible with more than 30 types of signal input and 16-channel analog signal input
Non-standard Customization Support:
· Custom digital and switching quantity input available
· Custom OEM for panel layout and boot interface supported
· Custom communication protocols and non-standard output of analog/switching signals available
· 12V/24V power supply supported
Installation Method:
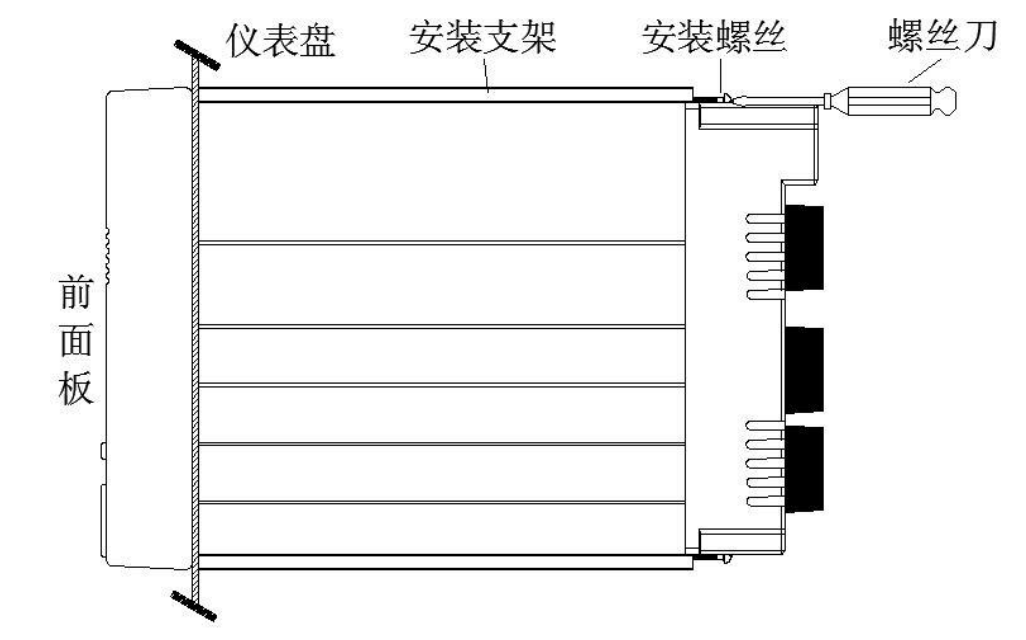
Installation Method:
· Step 1: Gently push the instrument forward into the mounting hole from the front of the mounting panel (steel plate is recommended) to fit closely against the dashboard. The thickness of the mounting panel shall be 2.0~8.0 mm.
· Step 2: As shown in the figure above, use a suitable screwdriver to tighten the long screws on the two mounting brackets supplied with the instrument for installation. Install one bracket respectively on the upper and lower sides of the instrument, and M4 standard screws shall be used for the dashboard mounting brackets.
· Step 3: After the main body of the instrument is installed, connect the signal wires and power wires.
![]() PR3100 Cabinet-Integrated Colorless Paperless Recorder Manual.pdf
PR3100 Cabinet-Integrated Colorless Paperless Recorder Manual.pdf