Product Features:
· OLED LCD Screen: Superior visual experience with a 10-fold longer service life.
· Imported Print Head: 300dpi resolution and 104mm printing width.
· USB Function: One-click import of parameter settings and export of backup data.
· Anti-static Performance: Contact discharge at 4000V; air discharge at 8000V.
· Anti-burst Pulse: Maximum 4000V.
· Anti-surge: Maximum 4000V.
Non-standard Customization Support:
· Customization of input and output signals is available.
· Custom OEM face label service is supported.
· Customization of appearance and key definitions is available.
· Customization of software interface and functional algorithms is supported.
· Customization of import and export content is available.
· Support for customized communication import and export functions, as well as export customization compatible with peer competing products.
Installation Methods:
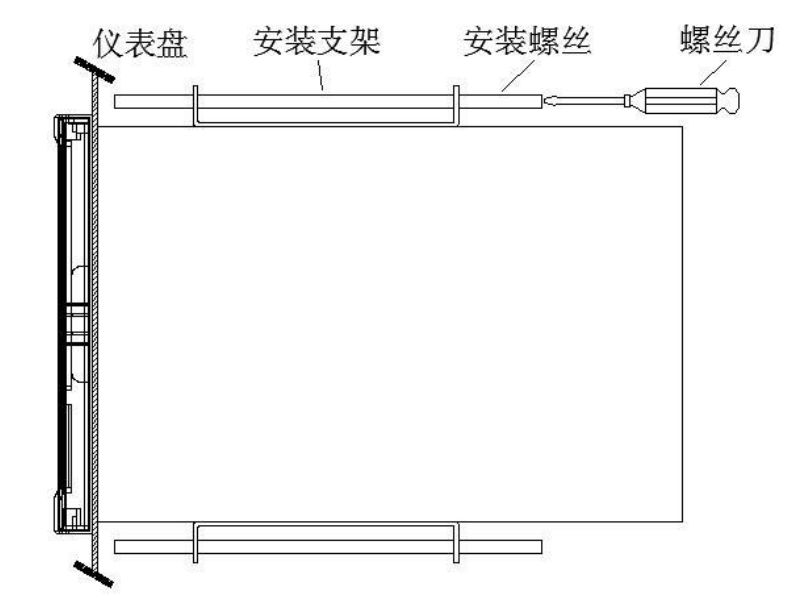
Installation Method:
· Step 1: Gently push the meter forward into the mounting hole from the front of the mounting panel (steel plate is recommended) to make it closely fit the dashboard. The thickness of the mounting panel shall be 2.0~8.0 mm.
· Step 2: As shown in the figure above, fasten the long screws on the two mounting brackets with a suitable screwdriver for installation using the brackets supplied with the meter. One bracket shall be installed respectively on the upper and lower sides of the meter, and M4 standard screws shall be adopted for the dashboard mounting brackets.
· Step 3: After the main body of the meter is installed, connect the signal line and power line.
![]() R1200 Paper Recording Instrument English Manual.pdf
R1200 Paper Recording Instrument English Manual.pdf